Affiliate Disclosure: EntrywayConsoleTable is reader-supported. When you buy through links on this site, we may earn a small commission at no extra cost to you.
Save Money with DIY Repairs
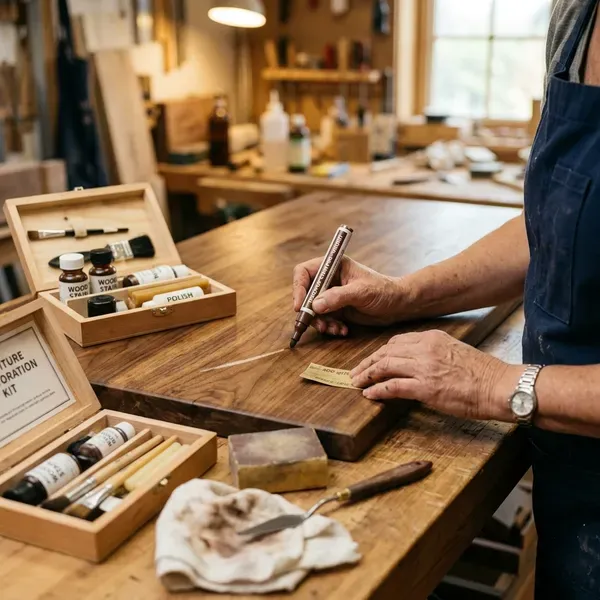
Common console table damage is often fixable at home with basic tools and a little know-how. Before replacing your table or calling a professional, try these proven repair techniques.
This guide covers the most frequent issues entryway console tables face and provides clear, step-by-step solutions.
Essential Repair Toolkit
Basic Tools
| Tool | Use |
|---|---|
| Screwdriver set (Phillips and flathead) | Tightening hardware |
| Wood glue (Titebond II or III) | Loose joints |
| Clamps (bar or pipe clamps) | Hold glued joints |
| Sandpaper (120-220 grit) | Smoothing repairs |
| Putty knife | Applying filler |
| Utility knife | Cutting, trimming |
| Hammer | Gentle persuasion |
| Measuring tape | Replacement parts |
Repair Materials
| Material | Use |
|---|---|
| Wood filler | Filling holes and chips |
| Wax repair sticks | Scratch repair |
| Furniture markers | Color matching |
| Wood stain | Refinishing |
| Polyurethane | Sealing repairs |
| Felt pads | Preventing damage |
| Furniture levelers | Stabilizing wobbles |
Common Repairs
Fixing Scratches
Light scratches (surface only):
- Clean the area with a damp cloth
- Rub a walnut or pecan meat over the scratch
- Buff with a soft cloth
- Apply furniture polish
Medium scratches (through finish into wood):
- Clean area thoroughly
- Apply furniture touch-up marker matching finish color
- Let dry 5-10 minutes
- Blend with soft cloth
- Apply clear wax to seal
Deep scratches (gouges in wood):
- Clean loose debris from gouge
- Fill with wood filler using putty knife
- Let dry completely (follow manufacturer instructions)
- Sand smooth with 220-grit sandpaper
- Stain to match surrounding wood
- Seal with clear finish
Veneer scratches:
- Use colored wax repair stick
- Rub firmly into scratch
- Buff with soft cloth
- Do not sand (will expose sub-layer)
Repairing Water Damage
White water rings (moisture trapped in finish):
| Method | Materials | Steps |
|---|---|---|
| Mayonnaise | Mayonnaise, soft cloth | Apply, let sit 10 min, wipe |
| Toothpaste | White toothpaste, cloth | Gently rub, wipe clean |
| Hair dryer | Hair dryer on low | Hold 6” away, move constantly |
| Denatured alcohol | Alcohol, fine steel wool | Lightly buff ring |
Dark water stains (moisture in wood):
- Sand affected area with 120-grit sandpaper
- Progress to 220-grit for smooth finish
- Apply wood bleach if stain persists
- Neutralize bleach with vinegar-water solution
- Let dry 24 hours
- Restain to match
- Apply new finish
Swollen particle board (irreversible):
- Remove damaged section if possible
- Cut replacement piece to size
- Glue and clamp new piece
- Fill seams with wood filler
- Sand and refinish entire surface
Fixing Wobbly Legs
Loose screws:
- Remove leg
- Fill screw holes with toothpicks and wood glue
- Break toothpicks flush
- Re-drill pilot hole
- Reinstall screw
Uneven legs:
- Place table on level surface
- Identify short leg(s)
- Install adhesive furniture levelers
- Adjust until table is stable
Loose joints:
- Separate joint carefully
- Clean old glue from both surfaces
- Apply wood glue to both surfaces
- Clamp tightly for 24 hours
- Wipe excess glue with damp cloth
Broken leg:
- Assess break type (clean break vs. splintered)
- Clean break: apply wood glue, clamp
- Splintered: reinforce with dowel or bracket
- Severe damage: replace leg entirely
Repairing Veneer
Chipped veneer (piece intact):
- Clean both surfaces
- Apply thin layer of wood glue
- Press chip into place
- Cover with wax paper
- Clamp with flat block
- Wipe excess glue after 30 minutes
Missing veneer (small area):
- Cut patch from matching veneer
- Trace and cut damaged area square
- Remove damaged veneer
- Glue patch in place
- Clamp with block for 24 hours
- Sand flush
- Refinish to match
Bubbled veneer:
- Slit bubble with utility knife
- Inject wood glue with syringe
- Roll flat with J-roller
- Weight with heavy books for 24 hours
- Wipe excess glue
Drawer Repair
Sticky drawer:
- Remove drawer completely
- Rub candle wax on runners and slides
- Check for misaligned hardware
- Adjust screws on drawer slides
- Reinstall and test
Separated dovetail joints:
- Carefully separate joint
- Clean old glue from pins and tails
- Apply fresh wood glue
- Tap back together with rubber mallet
- Clamp until glue dries
- Check squareness before glue sets
Broken drawer bottom:
- Remove drawer bottom
- Measure exact dimensions
- Cut 1/4-inch plywood to size
- Slide new bottom into grooves
- Secure with small brads
Fixing Loose Hardware
Loose knobs and pulls:
- Tighten screws (don’t overtighten)
- Apply thread-locking compound
- Add washer behind knob
- Fill and redrill stripped holes
Loose hinges:
- Tighten all screws
- Fill stripped holes with toothpicks and glue
- Use longer screws if needed
- Adjust hinge alignment
Surface Damage Repairs
| Damage | Material | Repair Method |
|---|---|---|
| Burn mark | Wood | Sand out or use wood filler |
| Cigarette burn | Veneer | Veneer patch |
| Paint stain | Any | Test solvent, sand if needed |
| Ink stain | Any | Rubbing alcohol |
| Candle wax | Any | Freeze with ice, chip off |
| Rust | Metal | Wire brush, rust converter, repaint |
| Peeling laminate | Veneer | Contact cement, weight down |
Structural Repairs
Fixing Separated Top Joints
Butcher-block or paneled tops can separate at glue lines:
- Pry open gap slightly
- Inject wood glue with syringe
- Clamp across the width
- Use cauls to distribute pressure
- Clean excess glue
- Clamp for 24 hours
Reinforcing Shelves
Sagging shelves need reinforcement:
- Remove shelf
- Measure and cut support bracket
- Install center support underneath
- Or replace shelf with thicker material
- Match existing finish
Frame Joint Reinforcement
For loose frame joints:
- Disassemble joint if possible
- Clean old adhesive
- Apply epoxy for maximum strength
- Clamp with corner clamps
- Install corner brackets for extra support
When to Replace vs. Repair
| Issue | Repair | Replace |
|---|---|---|
| Scratches | ✓ | |
| Loose joints | ✓ | |
| Water rings | ✓ | |
| Broken leg | ✓ (clean break) | ✓ (splintered) |
| Swollen particle board | ✓ | |
| Warped top | ✓ | |
| Broken glass | ✓ | |
| Extensive veneer damage | ✓ (small area) | ✓ (large area) |
| Structural rot | ✓ | |
| Outdated style | ✓ |
Prevention Tips
After repairing, prevent future damage:
- Use felt pads under all items
- Clean spills immediately
- Maintain consistent humidity
- Keep away from heat sources
- Use coasters and placemats
- Dust regularly
- Apply protective finish as needed
- Check and tighten hardware annually
Final Recommendation
Most console table damage is fixable with basic tools and patience. Start with the simplest repair method and work up to more involved fixes. When in doubt, test your repair technique in an inconspicuous area first.
Remember: A repaired table with character is better than a replaced table without history.
Ready for supplies? Shop repair tools and materials on Amazon.