
Affiliate Disclosure: EntrywayConsoleTable is reader-supported. When you buy through links on this site, we may earn a small commission at no extra cost to you.
A console table over about 30 inches tall should be anchored to the wall whenever kids, pets, or hard floors are around. The job takes roughly 15 minutes with a $10-25 anti-tip kit, a drill, and a stud finder — and it turns a potentially toppling piece of furniture into a safe one.
Quick Answer
- Hardware: a furniture anti-tip kit (L-bracket and strap) is $10-25
- Mount point: back rail or top frame of the console, at the highest point
- Wall side: preferably a stud; otherwise drywall anchors rated for the weight
- Tools: stud finder, drill, level, pencil, screws from the kit
- Result: the console is fixed to the wall and resists tipping
If your console is under 30 inches or sits on carpets with nothing on upper shelves, the risk is lower — but anchoring is cheap and takes minutes, so when in doubt, secure it.
Do I really need to anchor a console table to the wall?
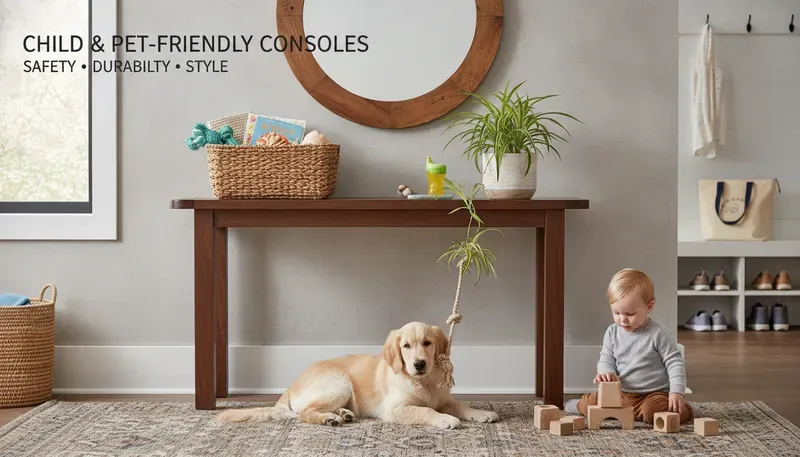
Yes if you have kids, pets, or heavy objects on the top shelves. A child climbing a shelf, adding a tabletop to pull from, or a pet leaping up shifts the center of gravity and can tip a tall console forward. Anti-tip standards exist in most places for a reason — anchor every console over 30 inches or that has children in the home.
What You Need
- Anti-tip kit (L-bracket plus strap) from any hardware store — $10-25
- Stud finder to locate the wall framing
- Drill with wood and masonry bits as appropriate for your wall
- Screws and anchors: the kit’s screws if you hit a stud; pro-grade drywall anchors if you don’t
- Level so the bracket sits straight
- Pencil to mark the drilling points
Can I use an ordinary L-bracket instead of an anti-tip kit?
Yes — an L-bracket (or corner bracket) rated for furniture works the same way. Screw one leg to the console’s back rail and the other to the wall at stud height. If you want it hidden, put the bracket on the inside of the back rail so it’s invisible at eye level.
Step-by-Step: Secure a Console Table to the Wall
- Empty the console. Remove everything from shelves and drawers so the frame is light and easier to maneuver, and the bracket can access the back.
- Push the console against the wall. Clear any baseboard obstruction by pulling the console an inch off the wall if your walls have trim. Level the table — a level table’s bracket matches the wall screw.
- Mark the bracket height. Place the bracket on the inside back rail, 1-2 inches below the top edge. Mark where the console-side screws go, and where the bracket’s wall arm lands.
- Find the stud. Run the stud finder along the wall at the bracket height and mark the stud edge. If the marked spot doesn’t hit, move the console slightly or offset the bracket 2-4 inches.
- If you hit a stud: drill a small pilot hole and drive the wall screws directly in.
- No stud nearby: use drywall anchors rated for at least the table weight, following the anchors’ recommended drill size for your sheetrock (usually 3/8”-1/2”).
- Attach the bracket to the console. Screw the bracket’s vertical (console) side into the back rail through the factory openings, making sure it anchors a solid frame piece and not a decorative back panel.
- Attach the bracket to the wall. Align the bracket with your wall marks, insert the wall screws (into stud or anchor), and tighten fully. Confirm with a level and a tug test.
- Test the anchor. Tug the console firmly off the wall — it should resist and follow the wall with you as you pull. For a strap kit, attach the strap’s loop to the top and the plate high on the wall, then tension it.
- Repack the shelves carefully. Put the contents back, and keep the risk low: the heaviest items go low and toward the back.
Where do screws go in the console?
Screw through the back rail or back frame piece — not merely the thin decorative back panel. The back rail is the structural piece the entire top hangs off, so a bracket on that holds the frame; anchoring only to a back panel can rip the panel out instead of holding the table.
I can’t find a stud where the bracket should go?
Then use drywall anchors rated for the weight, sized to your sheetrock. That’s tested and standard: anchors spread the load across the drywall. Toggle bolts are the strongest drywall fix and work where no stud exists, as long as the bracket positions you have clearance behind to insert a toggle.
Anti-Tip Rules
- Console over 30” tall: anchor it in a family home, always
- Drawers or shelves: anchoring matters twice as much — drawer blocks shift center of gravity forward when opened fully, plus a toddler’s climber pulls the same forward-lean
- Children: anchor always where kids are present — kids under 5 climb with the most confidence
- Pets: large dogs leaning on or jumping on a console need the same anchoring as a child
- Keep heavy items low: weight low and to the back in the console reduces the tip risk even when hardware goes unused
Common Mistakes
- Screwing into the back panel only. The screws must land in the back rail/frame. A thin back panel rips out when the table’s being pulled.
- Skipping the stud or the right anchor. Screwing into drywall with no anchor means the screw pulls out at the first real tug. Use studs or rated drywall anchors.
- Not leveling the console first. A wobble in the console shifts the bracket off its mark and creates a sloppy mount; the bracket’s wall screw can’t seat cleanly either.
- Leaving slack in the strap. A strap with slack doesn’t stop the initial tip; the top has to tip before it engages. Keep the strap taut.
- Putting heavy shelves at the top. Anchoring protects people, but a top-heavy console still rocks even when attached; keep heavy items low.
What if my console table has no flat back rail?
Choose the nearest solid frame line: the top stretcher under the surface, a side rail, or the leg corners. On unusual open-frame consoles, use a pair of small anti-tip straps placed about an inch in from each end — each strap prevents the frame twisting at the point the leg meets the wall.
FAQ
How long does it take to secure a console table?
The full anti-tip installation takes 15-30 minutes including finding the stud, drilling, and tightening the bracket. That’s for a standard console with a back rail — unusual frames, masonry walls, or awkward corners add time.
What weight rating do my drywall anchors need?
Use anchors rated for at least the table’s finished weight (table + typical contents). Many kits say “50 lbs” but that’s the load they hold in drywall alone — for a family setting you want 75-100 lb-rated anchors if the table is heavy.
Can little furniture straps hold a console table?
Yes — anti-tip straps rated floor-to-wall are designed to hold furniture of that size. One strap on each side near the top addresses tip and counterweight. Test the tension after install: a properly tensioned strap won’t let the top move an inch.
Do I need to anchor a console table behind a sofa?
Behind a sofa, a console isn’t a climbing or traffic risk the same way, but it should be anchored anyway if a child could reach it from the sofa — a toddler can stand on sofa cushions and climb onto the table. The over-30-inches rule still applies right behind a couch.
Should I anchor both the console and the mirror above it?
Anchor the mirror as well — a heavy frame that falls off the wall is an injury risk independently. Mirrors over console tables should be hung with a sturdy D-ring, wire, and hardware rated for their weight; finish the pair as a unit when you do the anti-tip job.
Real-World Entryway Scenarios (What Actually Fits)
Scenario A - 36-inch apartment hall. You have 36 inches wall to wall. Subtract 36 inches for walkway and you get zero - which is why a standard 11.8-inch console does not work here. The picks in this guide at 9.5 inches are the compromise: you keep about 26.5 inches of walkway, which is tight but passes for a single person with a bag. Add wall anchoring and keep the top to a tray and a low lamp.
Scenario B - 42-inch hall with a door swing. A 42-inch hall with a 30-inch door that swings inward needs the table on the hinge side, not the handle side, so the door clears. Max depth here is 6 inches if you keep a full 36-inch walkway. That points you at the ultra-slim 5.9-inch charging model or a wall shelf. If you can live with 32 to 34 inches of walkway, an 11.8-inch table fits and gives you a shelf.
Scenario C - 60-inch entry nook. This is the sweet spot for a 40 to 47-inch console. Two-thirds of 60 is 40, so a 40-inch or 47-inch table looks built-in. You have room for a mirror two-thirds the table width, a lamp, and a plant. Storage-wise, two shelves or two drawers hit the right density without crowding.
Scenario D - 90-inch foyer wall. Here a 63-inch table shines. Two-thirds of 90 is 60, so 63 is proportional. The longer span needs a braced underside - look for a lower-shelf rail or X-brace - otherwise the center sags under a lamp and books. Leave at least 4 to 8 inches between mirror bottom and tabletop so the composition reads as one piece.
Choosing storage vs surface. If your entry collects five things a day - keys, mail, sunglasses, dog leash, kid backpack - you need drawers. One shelf will not hide that. If your entry is mostly a visual anchor with a mail tray, open shelves with baskets are faster to use and easier to style.
Materials and maintenance. Matte water-resistant coatings hide fingerprints and wipe clean after wet umbrellas - that is why most picks use them. Solid wood can be refinished; MDF cannot, but it costs far less. In humid climates, keep indoor humidity 40 to 60 percent and seal end grain.
Stability you can test at home. After assembly, do two checks: a 5-pound lateral push at the top - sway over a quarter inch means retighten or add L-brackets. And a straight edge under the center with your heaviest decor on top - a gap over an eighth inch means the top is overstressed. Anchor any table over 30 inches tall into a stud.
Quick Measurement Worksheet
- Wall length: ______ inches x 0.66 = ideal table length. 2. Hallway width: ______ minus 36 = max depth. 3. Height: 29.5 to 31.5 inches standard. Write those three numbers and compare to the spec box above before you buy.
Common Mistakes to Avoid
Mistake 1 - Buying for the photo, not the hallway. A 14-inch deep table looks great in a staged foyer but eats 14 inches of a 38-inch hall. Always do the walkway math first. Mistake 2 - Ignoring the door swing. If the entry door swings in, a table on the handle side will get hit. Put the table on the hinge side. Mistake 3 - Forgetting anchoring. A 30-inch tall table with a 9.5-inch footprint tips easily. Use the anti-tip kit in a stud. Mistake 4 - Overloading the front edge. Weight on the front edge applies torque to the rear legs - center heavy items over the vertical supports and keep the heaviest pieces on the bottom shelf.
Finish and Care by Traffic Level
High-traffic entries with kids, pets, and wet shoes need matte water-resistant coatings - they hide fingerprints and wipe clean. Gloss and glass look premium but show dust and need weekly wiping. Solid wood can be re-oiled; MDF cannot. In sunny entries, UV fades rattan and light wood - rotate or choose a UV-stable finish. Keep humidity 40 to 60 percent; wipe spills fast; use felt pads under decor.
Price and Longevity Reality Check
An 80 dollar MDF console typically lasts 3 to 5 years before the top warps in humidity. A 120 dollar engineered wood with water-resistant top lasts 10 to 15 years. Over 200 dollars you buy solid wood and serviceable hardware. Divide price by expected years - the cheapest upfront is rarely cheapest per year. Check the listing for current price as of Aug 2026; our ranges are snapshots.
Related Guides
- Child & Pet Friendly Console Tables — designs that are sturdier and safer for families
- Console Table Assembly Guide — build it level and square before the anchor
- Console Table Weight Capacity — how much a console can actually hold per shelf
- Console Table Care Guide — protecting the finish after mounting
- Best Entryway Console Tables 2026 — stable, well-built picks to start from
🔥 Today's Best Console Table Deals
Hand-picked discounted picks from AliExpress — prices change often, check the live price.
 -69%⚡ Lowest Price
 -64%
-64% -63%🔥 Best Deal