Affiliate Disclosure: EntrywayConsoleTable is reader-supported. When you buy through links on this site, we may earn a small commission at no extra cost to you.
About the author � Jessica Chen. Jessica covers interior design and furniture styling for EntrywayConsoleTable.com.
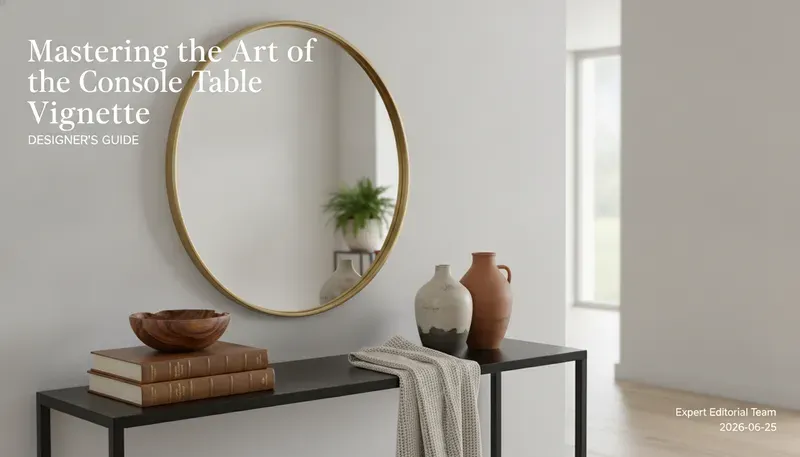
A well-styled console table can transform how your entryway feels. The secret is learning how to layer objects with intention so the arrangement looks polished, not cluttered. I’ve put together this guide to walk you through the process.
Table of Contents
- Why Your Entryway Vignette Matters
- The Golden Rules of Visual Composition
- The Anatomy of a Perfect Vignette
- Materiality and Surface Selection
- Lighting Strategy: Illuminating the Narrative
- Step-by-Step: Styling Your Console Like a Pro
- Style Deep Dives: From Minimalist to Maximalist
- Sizing and Scale: Avoiding Common Pitfalls
- Seasonal Rotations: Keeping the Vignette Fresh
- Maintenance and Longevity
- Frequently Asked Questions
Why Your Entryway Vignette Matters
A vignette is a small arrangement of objects on a surface. On a console table, it becomes the focal point of your entryway. You don’t need a design degree to make it work, just a bit of intention.
Console tables date back to 18th-century France and England, where they were wall-mounted pieces topped with marble and paired with mirrors. Today the concept is still the same: create a welcoming space that feels complete.
Expert Tip: Think of your vignette as a still life. It needs a foreground, a middle ground, and a background to create depth.
The Golden Rules of Visual Composition
Before you place a single candle or book, you must understand the mathematical and psychological principles that govern “beauty.”
The Rule of Three
Humans are hardwired to find odd numbers more engaging than even ones. Three is the magic number because it creates a sense of movement and prevents the eye from getting “stuck” on a symmetrical pair. When styling, group items in sets of three, varying their heights and textures.
The Power of the Triangle
To ensure your vignette looks professional, aim to create “triangles” of varying heights. An imaginary line drawn between the top of a lamp, the top of a stack of books, and the top of a small bowl should form a triangle. This prevents the “clumping” effect where objects of similar height look like a cluttered skyline.
Negative Space: The Breath of Design
In woodworking, we respect the “grain” and the space between the fibers. In design, we respect negative space. Not every square inch of your console needs an object. Negative space allows the eye to rest and highlights the importance of the pieces you did choose to include.
Table 1: Compositional Techniques at a Glance
| Technique | Core Principle | Designer Goal |
|---|---|---|
| Rule of Three | Grouping in odd numbers | Creates organic rhythm and visual interest. |
| Pyramid Stacking | High center, lower sides | Directs the eye upward and provides stability. |
| Layering | Placing items in front of others | Adds 3D depth and prevents a flat look. |
| Color Blocking | Using a cohesive palette | Unifies disparate objects into a single story. |
The Anatomy of a Perfect Vignette
A successful vignette requires a specific set of “characters.” Without these, the arrangement feels incomplete.
1. The Anchor (The Background)
Every vignette needs a “soul”�a large-scale piece that grounds the table. Usually, this is a large mirror or a piece of statement art hung 6-8 inches above the table surface.
- Mirrors: Expand the space and reflect light.
- Art: Introduces color and personal narrative.
2. The Vertical Element (The Height)
Height is crucial for preventing a “flat” look.
- Lamps: Provide both height and functional ambient light.
- Tall Vases: Can hold seasonal branches or remain sculptural on their own.
3. The Textural Layer (The Middle)
This is where the tactile nature of your design shines.
- Books: Use coffee table books to provide elevation.
- Trays: A wood or marble tray acts as a “frame within a frame,” corralling smaller items like keys or decorative beads.
4. The Organic Element (The Life)
Every vignette needs something “living” (or high-quality faux).
- Greenery: A simple eucalyptus sprig or a potted succulent adds a much-needed pop of chlorophyll and soft edges to a hard wooden table.
Materiality and Surface Selection
As woodworking specialists, we must emphasize that the surface of your table dictates what looks good on top of it. A solid oak console has a different visual weight than a glass-topped industrial piece.
Table 2: Material Compatibility Guide
| Console Material | Best Vignette Materials | Mood Created |
|---|---|---|
| Dark Walnut | Brass, White Marble, Glass | Sophisticated, Mid-Century Modern |
| Reclaimed Pine | Ceramic, Matte Black Metal, Linen | Rustic, Wabi-Sabi, Farmhouse |
| Glass / Acrylic | Weighty Books, Heavy Stone, Chrome | Contemporary, Airy, Minimalist |
| Painted / Lacquered | Natural Wood, Woven Baskets, Gold | Coastal, Transitional, Chic |
If you are currently looking for the perfect foundation for your vignette, consider the scale of your hallway first. A narrow console is often better for tight corridors.
Lighting Strategy: Illuminating the Narrative
Lighting is often the “forgotten” step in vignette creation, yet it is arguably the most important. In the entryway, you are typically dealing with a lack of natural light.
Sconces vs. Lamps
- Sconces: If your console is permanent, wall-mounted sconces on either side of a mirror create a stunning, hotel-like symmetry.
- Lamps: A single, large lamp on one side creates an asymmetrical, modern look. Two lamps on either end create a formal, traditional look.
Color Temperature (Kelvin)
For a welcoming entryway, always use bulbs in the 2700K to 3000K range. This warm light enhances the natural grain of wooden console tables and creates a cozy “welcome home” glow. Avoid “Daylight” bulbs (5000K+), which can make a home feel like a clinical office.
Step-by-Step: Styling Your Console Like a Pro
Follow this sequence to build your vignette from scratch.
Step 1: The “Tabula Rasa” (Clear the Deck)
Remove everything from the table. Wipe down the surface with a high-quality wood polish. If your table is a reclaimed wood piece, use a wax-based cleaner to bring out the patina.
Step 2: Establish the Anchor
Hang your mirror or art. Ensure it is centered either to the table or to the wall, depending on your layout. The bottom edge should be roughly 6-10 inches above the tabletop.
Step 3: Add the Vertical Weight
Place your tallest item first. This is usually a lamp or a tall vase. If you’re going for symmetry, place one on each end. For asymmetry, place the tallest item on one side and a medium-height item (like a stack of books with a small object on top) on the other.
Step 4: Layer the “In-Betweens”
This is where you bridge the gap between the tall items and the table surface.
- Place a stack of 2-3 books horizontally.
- Lean a smaller piece of art against the larger anchor piece.
Step 5: Incorporate Texture and “The Tray”
Introduce a tray to one side. This is your “landing strip.” It provides a home for keys, mail, or a scented candle. The tray adds a layer of material contrast�if your table is wood, use a metal or leather tray.
Step 6: The Final Polish (The Organic)
Add your plant or flowers. This softens the hard lines of the furniture and books.
Expert Tip: Take a photo of your vignette. Looking at a 2D image helps you see balance issues that your 3D vision might overlook. If it looks cluttered in the photo, remove one item.
Style Deep Dives: From Minimalist to Maximalist
Your vignette should reflect the architectural style of your home.
The Modern Minimalist
Focus on “Sculptural Integrity.”
- Anchor: A circular mirror with a thin black frame.
- Vertical: A single, oversized ceramic vase with one dried branch.
- Surface: One high-quality design book and a small marble dish.
- Key: Less is more. Focus on the silhouette of the objects.
The Rustic Farmhouse
Focus on “Organic Warmth.”
- Anchor: A window-pane mirror or a piece of landscape art.
- Vertical: A chunky wooden lamp base with a linen shade.
- Surface: A woven basket underneath the table for shoes, and a stack of vintage books on top.
- Key: Mix textures�wood, twine, linen, and aged metal.
The Transitional Executive
Focus on “Symmetry and Sophistication.”
- Anchor: A large, gold-framed abstract painting.
- Vertical: Matching crystal or glass lamps.
- Surface: A silver tray and a small bowl of orchids.
- Key: Maintain clean lines and a restricted color palette of blues, whites, and metallics.
Sizing and Scale: Avoiding Common Pitfalls
One of the biggest mistakes we see at EntrywayConsoleTable.com is “Dollhouse Syndrome”�choosing objects that are too small for the table.
Table 3: Scale and Proportion Guide
| Console Length | Recommended Anchor Size | Lamp Height | Max Number of Items |
|---|---|---|---|
| 36” (Small) | 24” - 28” Mirror | 18” - 22” | 3-5 |
| 48” (Standard) | 30” - 36” Mirror | 24” - 28” | 5-7 |
| 60”+ (Grand) | 40”+ Mirror or Gallery | 30”+ | 7-10 |
The “Hand Rule”: If an object is smaller than your hand, it probably shouldn’t be the only thing on a console table. Group small objects together on a tray to give them “collective mass.”
Seasonal Rotations: Keeping the Vignette Fresh
Your console shouldn’t look the same in December as it does in July.
- Spring: Swap heavy candles for fresh tulips and light-colored linen books.
- Summer: Incorporate coastal elements�a piece of driftwood or a bowl of smooth sea stones.
- Autumn: Introduce warmth with amber glass, dried wheat stalks, and deeper textures like velvet or dark wood.
- Winter: Focus on light. Add extra candles, evergreen sprigs, and perhaps a small, high-quality wooden bowl filled with pinecones.
Maintenance and Longevity: A Woodworking Specialist�s Perspective
Since the console table is a high-traffic area, the vignette items are frequently moved. This can lead to scratches.
- Felt Pads: Always apply small felt pads to the bottom of lamps, vases, and trays. This is critical for walnut or cherry wood tables which can scratch easily.
- Coaster Usage: If you place a vase of real flowers on the table, ensure it sits on a coaster or a tray. Condensation can ruin a wood finish in hours.
- Dusting: Dust your vignette weekly. Dust buildup on a vignette makes the entire home feel neglected. Use a microfiber cloth.
Frequently Asked Questions
How high should I hang a mirror above my console table?
The general rule is 6 to 10 inches above the table. If the mirror is hung too high, it feels “disconnected” from the furniture. It should feel like part of the same visual unit.
Can I put a TV above a console table vignette?
While possible, it�s difficult. A TV is a “black hole” visually. If you must, keep the vignette items very simple and low-profile so they don’t block the screen or create a cluttered look.
What if my console table is very narrow?
For narrow tables (10-12 inches deep), focus on height rather than depth. Use tall, slim lamps and lean art against the wall instead of using bulky frames. Use a “wall-hugging” tray.
Should I match the metal of my lamp to the metal of my mirror frame?
Not necessarily! Mixing metals (e.g., a brass lamp with a matte black mirror frame) adds designer-level complexity. Just try to keep the “undertone” consistent (e.g., both warm or both cool).
How do I style the space under the console table?
If your table has an open bottom, use it! A pair of matching ottomans, a large woven basket, or a stack of oversized floor books can ground the piece and hide unsightly cords.
Is it okay to have an asymmetrical vignette?
Absolutely. Asymmetry is often more modern and dynamic. The key is to balance “visual weight.” A tall lamp on the left can be balanced by a heavy stack of books and a medium vase on the right.
Final Verdict: Crafting Your Story
Creating a visually appealing console table vignette is a journey of trial and error. Start with your Anchor, build your Verticals, and layer in your Organics. Remember the Rule of Three, but don’t be afraid to break it once you’ve mastered the basics.
Whether you are working with a mid-century walnut piece or a modern glass table, the goal is the same: to create a space that makes you exhale with relief the moment you walk through your front door.
Written by: Elias Thorne, Senior Interior Designer & Woodworking Specialist
Fact-checked by: Sarah Jenkins, Lead Stylist at EntrywayConsoleTable.com